
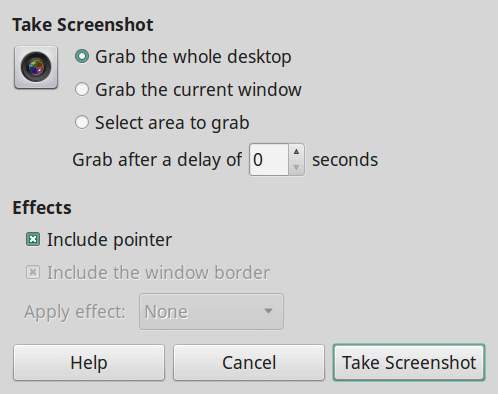
GNOME Screenshot is a built-in utility on GNOME desktops for taking screenshots. It is a powerful tool to capture the entire screen or specific area of the Linux screen. You can make use of the shortcuts to access the screenshot features quickly. Right from the GUI interface, you can select to grab the whole desktop, active window, or the specific portion of the screen. Apart from that, you can also choose to include various things like a mouse pointer, windows border, and effects. Along with the ability to storing the files locally, you can also share the screenshots via email or web.

Keyboard Shortcuts
| Print Screen | Screenshot the entire desktop |
| Alt + Print Screen | Screenshot the active window |
| Shift + Print Screen | Screenshot the selected area |
While taking a screenshot, press the CTRL key to copy the screenshot to the clipboard. While using the keyboard shortcuts, the screenshots will be stored in the Pictures folder.
Set GNOME Screenshot as the default App to Take Control of Print Screen
1. Select the System menu on the home screen and click Control Center.
2. Click Keyboard Shortcuts.
3. Find and select the menu which labeled as Take a screenshot. Enter a new set of shortcut keys to free up the Print Screen Key.
4. Press the +Add menu and enter the following details on the respective field
- Name – GNOME Screenshot
- Command – gnome-screenshot
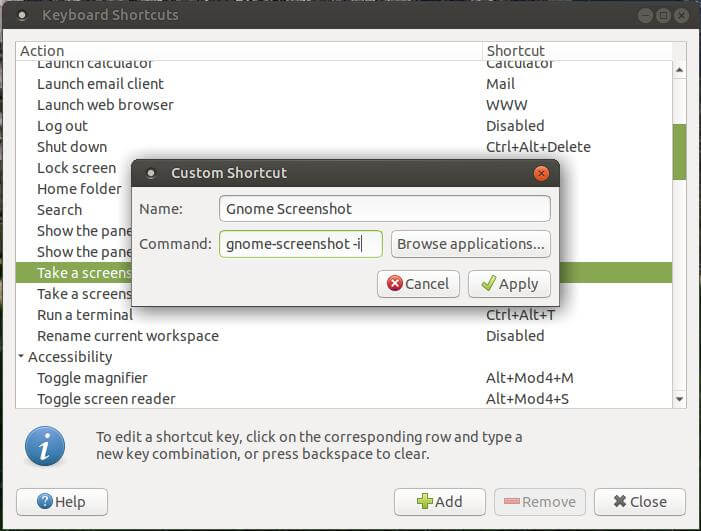
5. Click Apply to create the new menu.
6. Now, go to the Custom Shortcuts menu and select GNOME Screenshot.
7. Press the Print Screen key, and the shortcut will be assigned.
Installing GNOME Screenshot
As we mentioned earlier, GNOME Screenshot is a pre-installed tool on GNOME desktops. If the tool is not available on your Linux computer, you can install it by using:
sudo apt-get install gnome-screenshot
After installation, launch the tool by typing
gnome-screenshot
Using GNOME Screenshot from Command Line
If you’re a regular user of Command-Line, you can make use of it access the GNOME Screenshot features:
To screenshot the currently active window, you need to use -w option.
gnome-screenshot -w
In order to capture the particular region of the screen, you need to use the -a option.
gnome-screenshot -a
By default, the app will not include tools like mouse pointer. For the mouse pointer, you need to use the -p option.
gnome-screenshot -p
To delay the screenshots, you have to use the –delay option along with the seconds.
gnome-screenshot --delay=4
To capture the screenshot along with the border, you need to use the -b command.
gnome-screenshot -b
To remove the border, you need to capitalize the b command
gnome-screenshot -B
You can also save your screenshot to your present directory with a dedicated file name. For this, you need to use -file command
gnome-screenshot –file=XXXXX
Instead of XXXXX, enter the file name that you want.
Related: Scrot – A Command Line Screenshot Tool for Linux
Other Useful commands
| -e | To add effects on the screenshot. It can be a border, shadow, and none. |
| -i | To run the tool in interactive mode |
| -? or -h | To get information related to the GNOME Screenshot tool |
Despite not having advanced editing features, GNOME Screenshot is more than handy on Linux computers to take screenshots for basic purposes. If you want additional features, you have to look out for third-party screenshot tools. Try this tool on your computer and share your feedback below.